Your Top 5 Ceiling Medallion Questions
When we first shared images of our living and dining room plaster ceiling medallions, we were overjoyed with the interest you all showed for these new additions to our house. We too were equally excited when the medallions arrived on our doorstep. We weren’t sure what to expect but were hopeful they would at a minimum meet our expectations.
“To our delight, they absolutely exceeded them.”
Throughout the install process, we asked you all what you were most interested in learning more about when it came to ceiling medallions. We’ve compiled a Top 5 list of your questions and will dive into answering them for you now. Without further ado, let’s get to it.

1. Why did you choose the specific brand you went with? What was your criteria? Did you look at other sources?
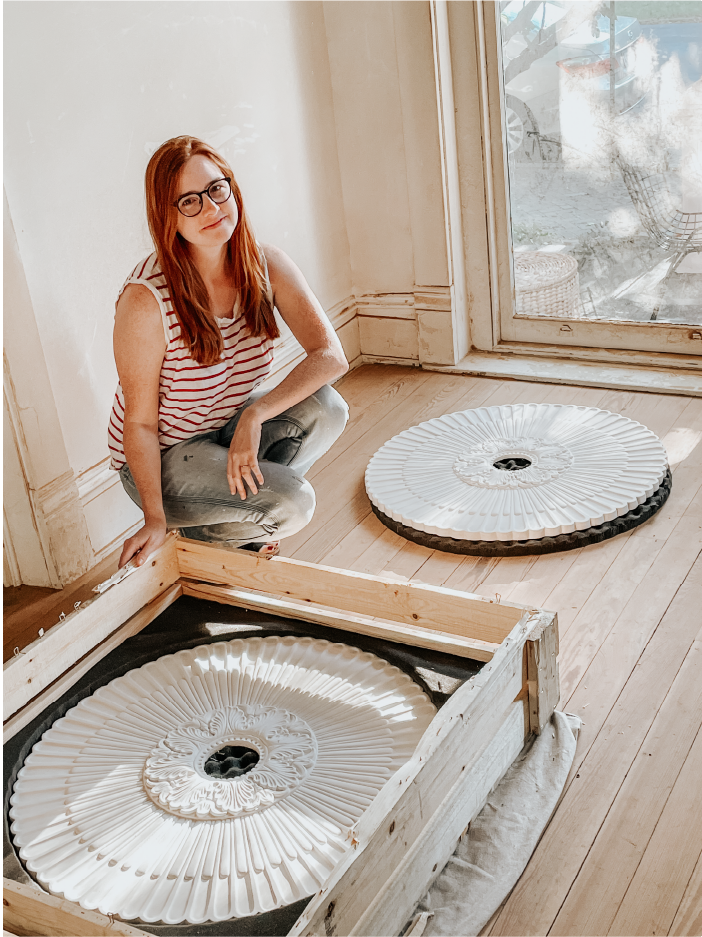
Detail level and scale were the two most important criteria. It’s surprising how much smaller a medallion appears when it is installed given the overhead distance - particularly in this case with an 11’ ceiling. Our medallions are 30” in diameter!
A lot of options out there are clumsy and crude in their detailing/casting - something we avoided by going with an ornamental plaster fabrication company called Decorators Supply. They are based out of Chicago and were founded in 1885. We loved that they had a long history of quality work and we were super happy with the final product.
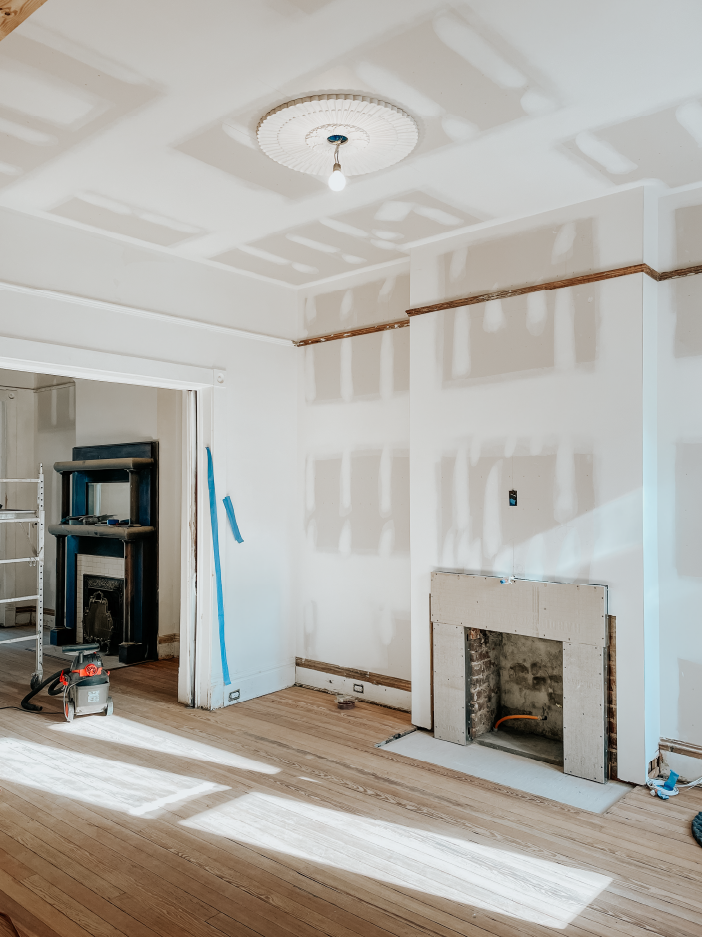
2. Why did you install the ceiling medallions before painting the ceiling?
The medallion needs to appear integral with the ceiling - thus it’s important to install and caulk it in place prior to painting so there will be no hairline crack between the two. As an added benefit, we could still see where the drywall joints were on the ceiling, indicating the joist locations. This helped us make sure we could anchor the medallion properly without adding too many unnecessary holes.
3. What other medallion material and style options are there and why did you ultimately go with plaster?
It’s possible to find wooden medallions as well as cast plastic options as well. In the case of the former, there is always a chance that they might split or shrink/swell differentials from the ceiling because of humidity changes. With the latter, most cast plastic options tend to be crude and cheap looking (good options might be out there - let us know if anyone has some good sources!).

4. How did you install the medallion without damaging the plaster?
It’s important to make sure the ceiling is flat, and if not, understand where the gaps will be behind the medallion so you don’t inadvertently pull it too tight to the ceiling and crack it (the small gaps at the edge can be caulked as long as you have solid contact elsewhere).
Also, working carefully and pre-drilling a countersink for the screws is essential. For a medallion as large as ours, it took two people to hold it up and screw, and using a rolling scaffold for that install was a huge help.
5. How will you attach the light fixture?
The medallion adds about and extra inch in depth beyond the finished ceiling surface, so we’ll need some extra-long screws to anchor the light fixture’s cross-bar to the medallion surface using screw holes in the electrical box above.
As you can see, there are many behind the scenes decisions that go into selecting a ceiling medallion. Whether it be the material choice, the detailing, or the scale, all factors ultimately contribute to the final aesthetic and appropriateness for the space. We hope this post gave you a little glimpse into the ceiling medallion world and that you’re inspired to install some of your own!
We wish everyone the best of luck with your future ceiling medallion endeavors and would love to see your installations. Be sure to tag us on instagram or send us a message telling us all about them.


