How We Saved Our Skylight
One of the features we fell in love with when we first saw this house was the original wire glass skylight in the stairwell. Light from above is key in a deep row house and this little skylight was super important to us for that reason. Unfortunately, keeping original building features often means you have to trade off modern day performance for charm. This skylight was sucking heat directly out of our house all winter and was a rusty mess at the roof. As much as we loved it as is, we knew we had to address the issues sooner rather than later.
“We had to ask ourselves “how are we able to get a new high performing skylight without sacrificing the charming style of the original?””
Today we’ll show you the creative solution that enabled us to preserve the old while still making use of modern-day building technology. We’ll give you all the details on what our solution was, how we got there, how we saved lots of $$$ and what we had to do to our original skylight to make it all work.
Is It Really Worth It?
You might be asking, what’s the big deal? Why do you need to worry about this skylight now? It looks good - why don't you just leave it? We had the same thoughts initially but a few things compounded that forced us to act a little sooner than we thought. The first of these reasons was our heating bills. They were through the roof. Literally. Old skylights like these actually have vents on the side to exhaust heat out of the space. This concept clearly predates modern AC and heating and is quite effective at removing heat in the summer. To give you some perspective on winter-time performance,, our heat bill in the month of January was $400. This skylight, along with the lack of insulation, was not helping our case.
The other issue this skylight presented was how it would interface with our new roof. When we got estimates, the roofers said they wouldn’t warranty the roof if we left the skylight as is. It was too much of a risk to interface a new roof with the rusty, busted old skylight curb.
“Most roofers said the entire skylight needed to be replaced in order for them to do the job. Clearly that was terrible news to hear.”
We did not take this piece of advice well. It was a non-starter for us. There was no way we were going to just replace the original skylight with a more modern, flat skylight. We weren’t willing to give up the aesthetics and charm that this skylight gave to the house. That’s when we started seeking out other options.
Replica, Replacement, or Something Totally New
Our first thought when the roofers said we needed a new skylight was - okay, can we just get a new one that looks exactly like the old one? This type of skylight is super common in old houses and surely we’re not the only ones that want the historic look with modern performance. While that statement is technically true, we quickly discovered that with charm comes $$$. To be more specific, the quote we got was $11,000. Just for the skylight!! The ridiculous part of it all is that the new, high-priced version of our exact same skylight wasn’t even insulated or higher performing. It was literally just a replica with single pane glass and all. The only difference is that it would be new and not rusting.
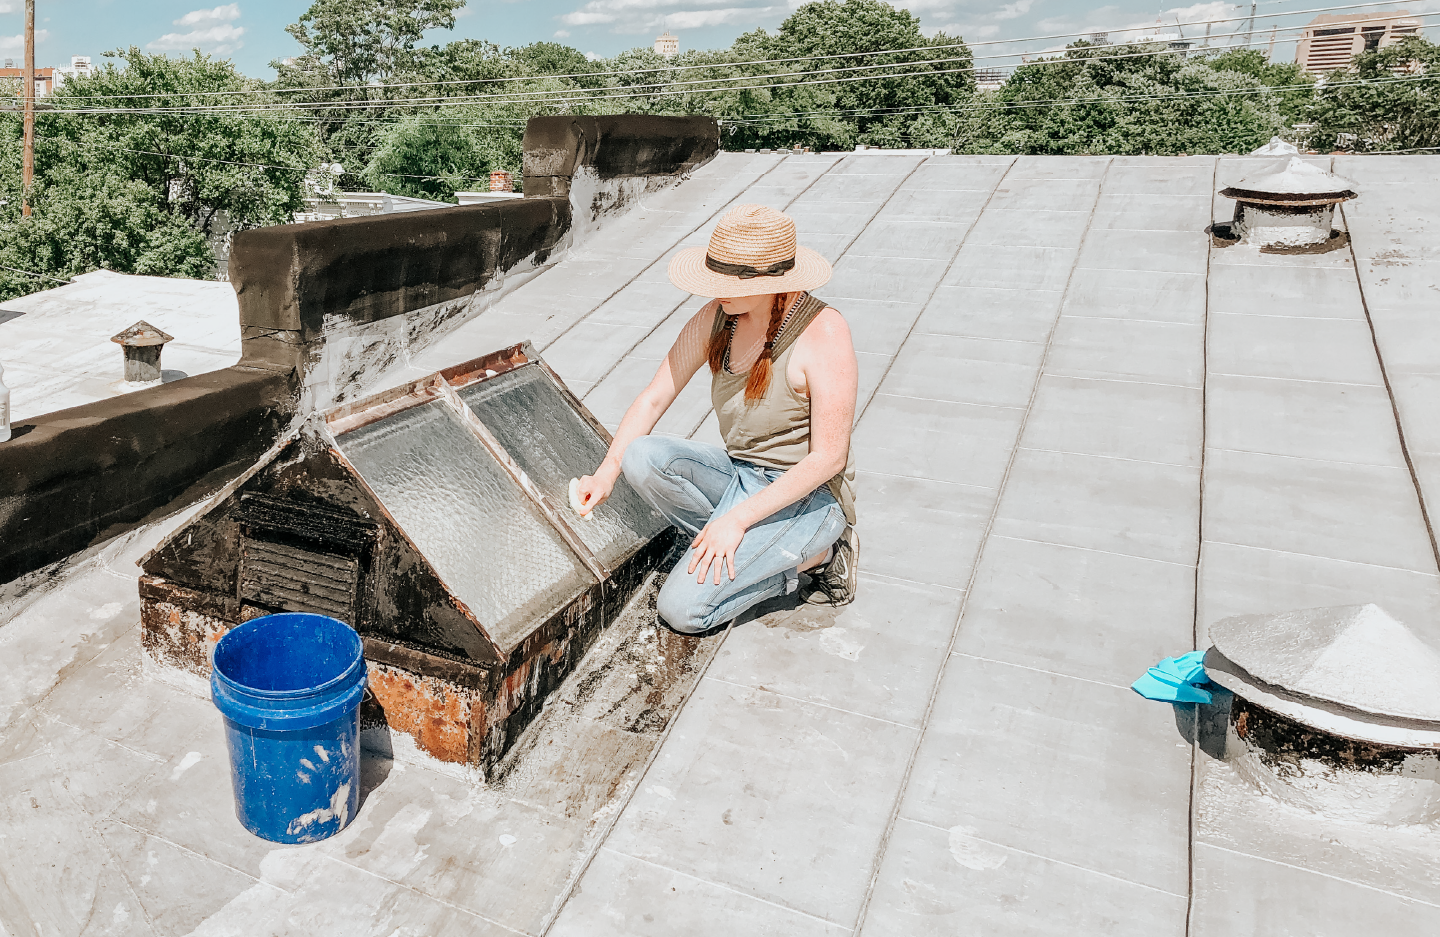
So with a replica off the table, the next option was to try and figure out how to keep our skylight as is but encase it with another skylight. Think russian nesting dolls - skylight edition. This idea actually came from our roofer. They’ve done similar projects before where they built up a custom solid curb on all sides of the skylight and then put a ‘flat’ piece of glass on top. With some back and forth sketches and discussion about height, we thought this could be a possible solution. The only problem with this was the solid sides. Right now, our skylight is a gable style that allows light to enter the space from fairly low angles. If you put up a solid wall, it would cast shadows onto our skylight and you would clearly be able to tell that something was built over the original skylight. To confirm this theory, Owen went up to the roof with a piece of cardboard and held it at the proposed wall height. You could definitely see the shadow - so for us, it was back to the drawing board.
Peek Owen’s shadow and the cardboard edge in this mock-up.
Here Comes the Dynamic Dome
We expressed our concerns to the roof estimator about the solid wall issues that came with this custom option. He took our feedback seriously and started to think outside the box. He recommended a “dynamic dome” as an alternative to the custom skylight. A dynamic dome is a fairly new commercial product, made by Velux, that is commonly used in warehouses and big-box stores. This seemed like a fairly odd pairing with our 1910 Richmond row house but we were intrigued. While you can read all about the many benefits of the dynamic dome on Velux’s site, the two that stood out to us were the light harvesting feature and the cost effectiveness. To get a dome big enough to span over our skylight, we needed the 51” x 74” size which clocks in right around $850. That is way better than the $11,000 price tag we saw earlier!
One of the many things we learned during this project is how big of a difference it makes to hire quality, well-informed tradespeople and to make the most of them as a resource. In this case, without a knowledgeable roofer, we would have never come up with the dynamic dome solution. Even if we had, we would have needed the roofers to be on board. It definitely paid to take the time to have all the back and forth in order to come up with a creative solution that worked for everyone.
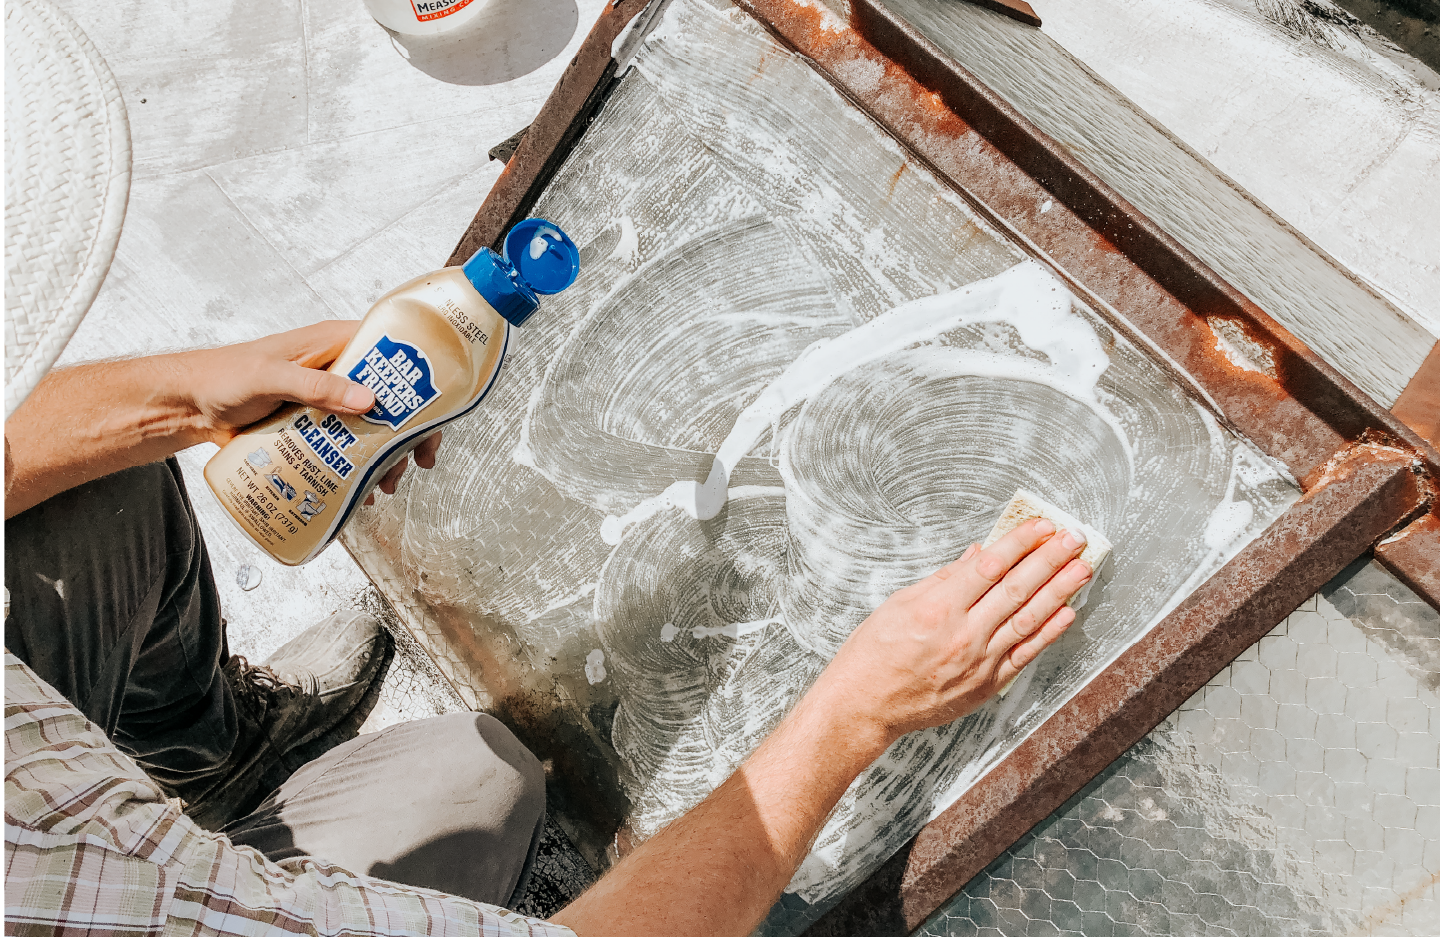
Cleaning Party
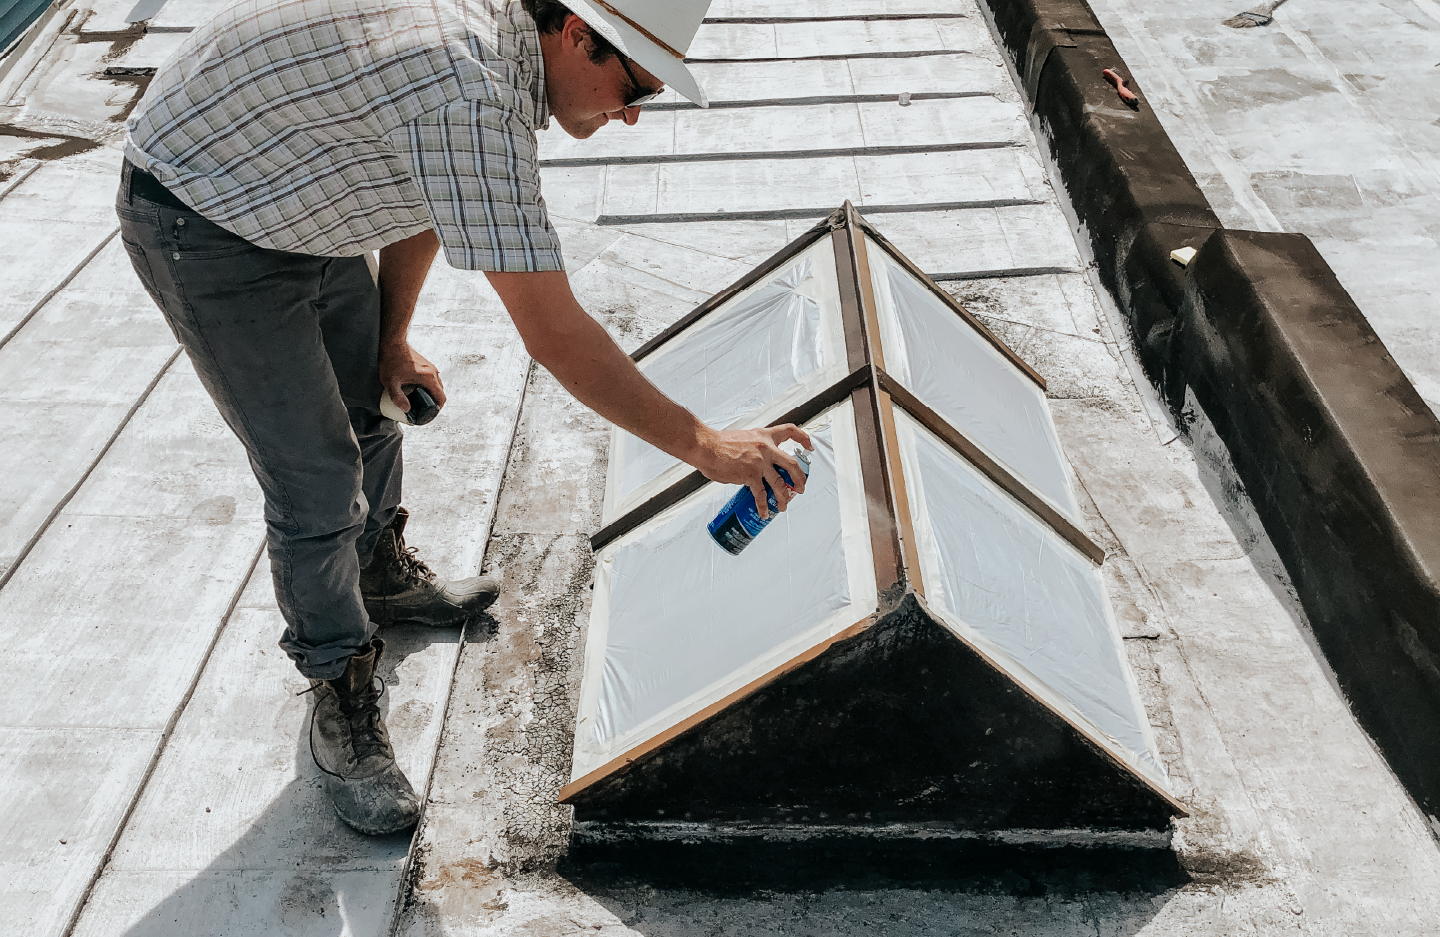
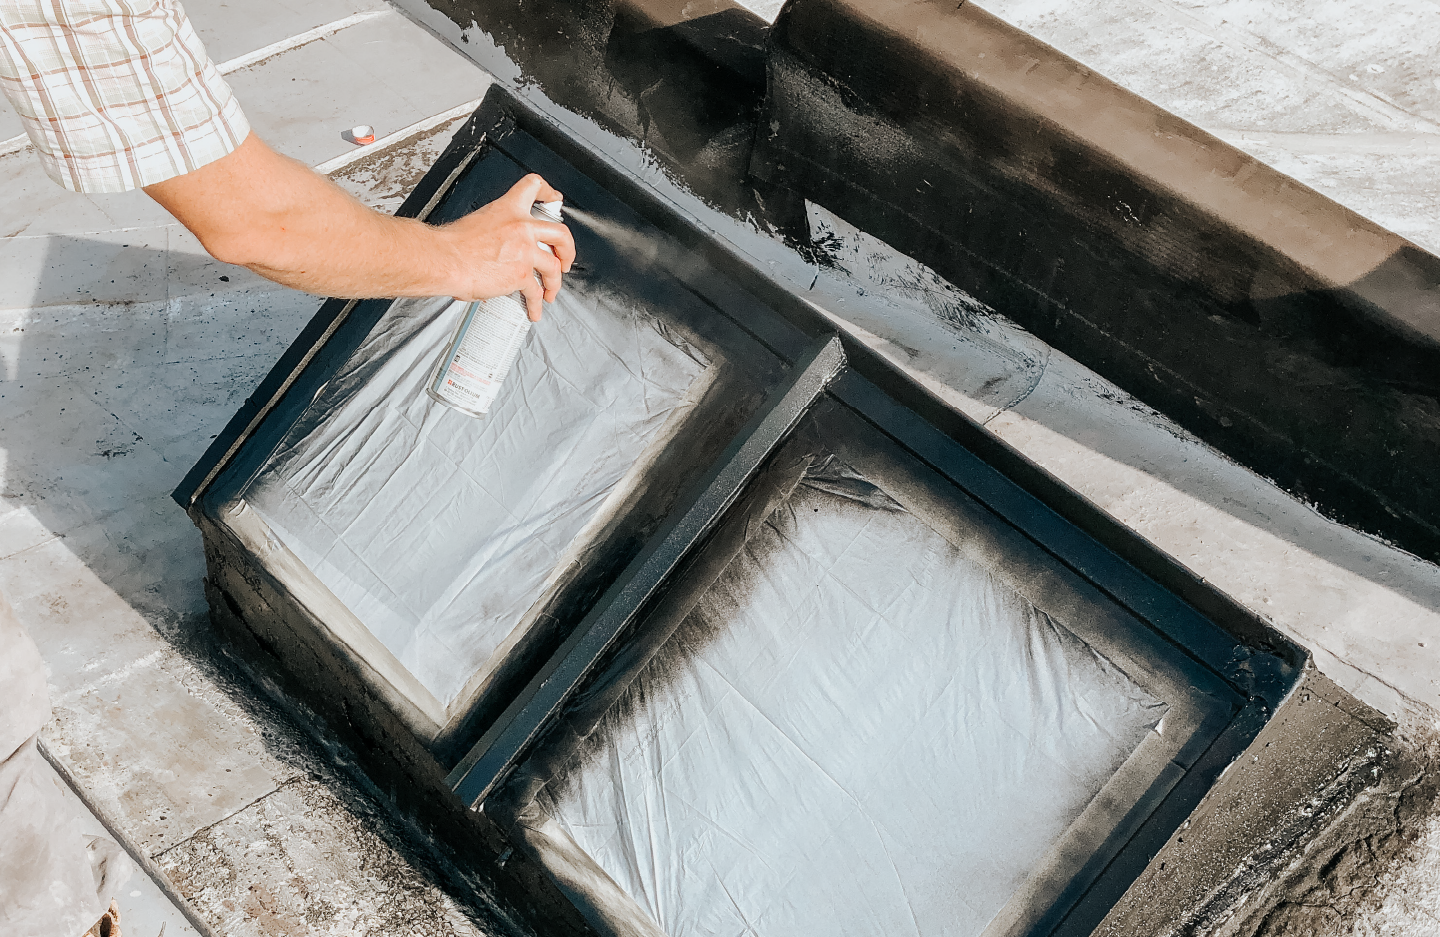
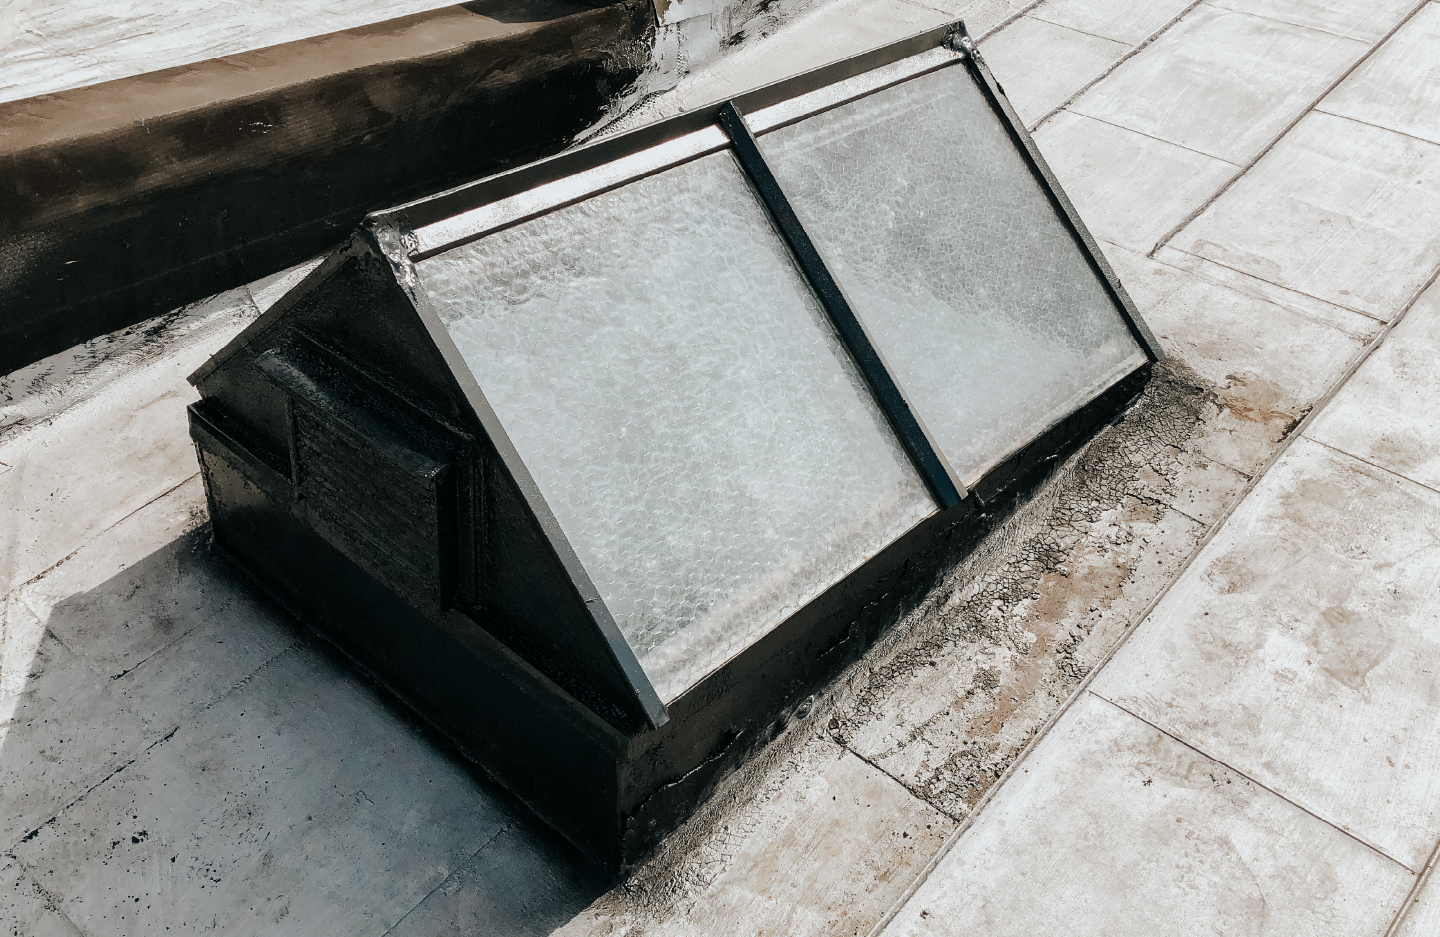
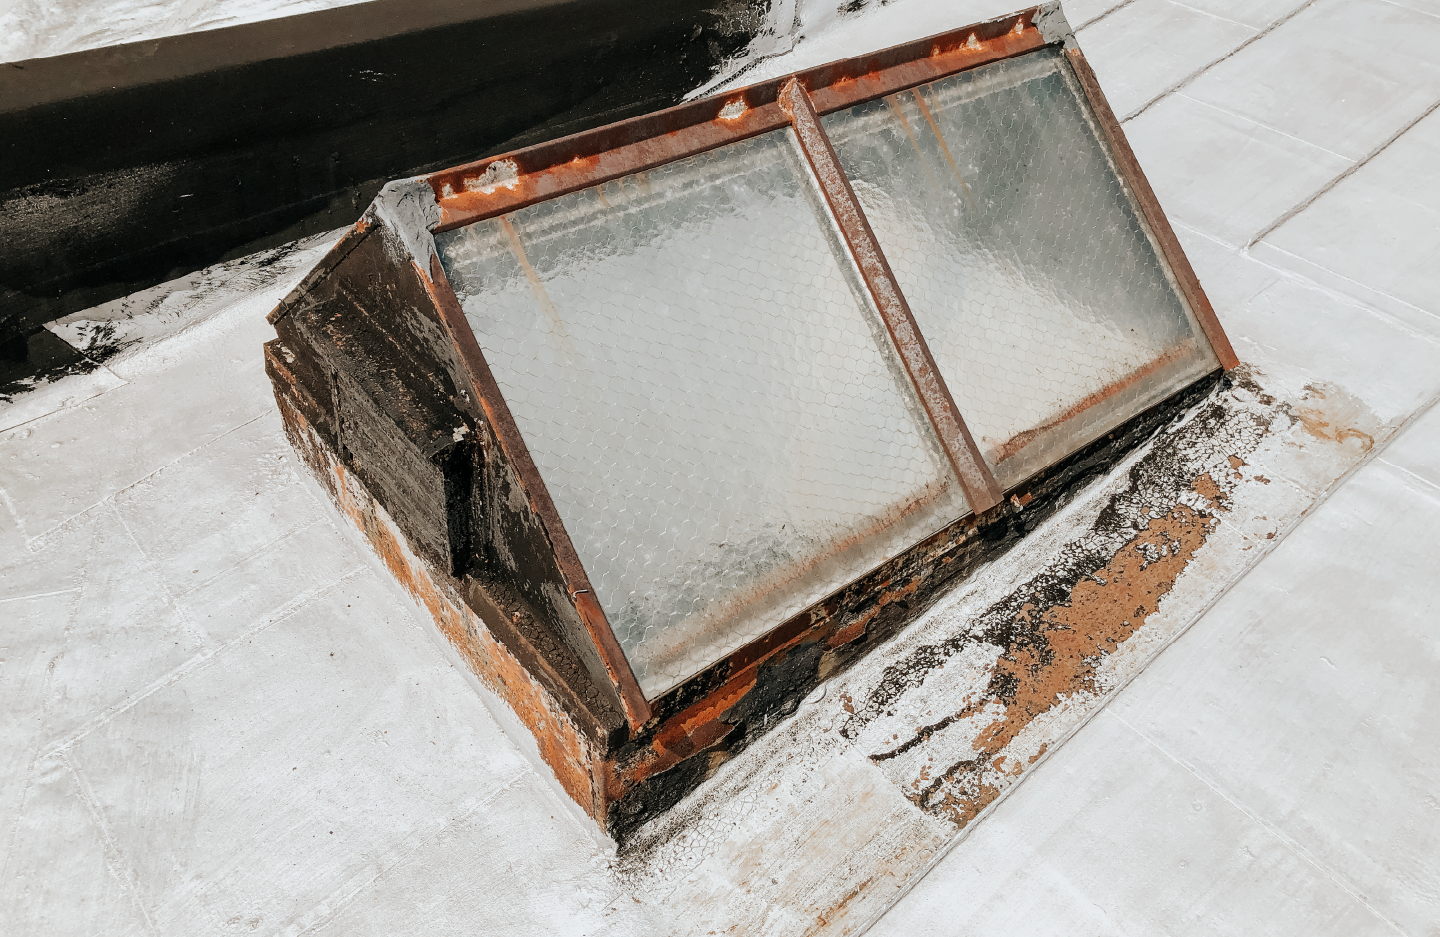
Now that the dynamic dome was our official direction, we need to prep our original skylight to be entombed forever. The first step was to clean up the glass. It was streaked with rust and was cloudy from all the years of dirt and rain. We also needed to stabilize the rusting frame. We started with Bar Keeper's Friend and a little elbow grease and then followed up with a vinegar-water solution. This pretty well took care of the glass. We then took a metal wire brush to the frame to clean it up and prep it for painting. After masking off the glass, we did a first coat with the Loctite Extend Rust Neutralizer to make a more paintable surface and then finished it off with black Rust-Oleum High Performance Enamel. If you check out the last 2 photos below, you can what a difference it made in the before & after.
Dynamic-Duh
With the handful of prep hours complete, this skylight was ready for the next step! Time to install our space-ship of a dome. We worked pretty closely with the roofers to make sure the curb was low enough to avoid shading the existing skylight. We actually had to have them re-do it because when they first built it, it was DEFINITELY too tall. It took some pushing, but ultimately they gave in and lowered the curb. It was pretty fascinating to watch the install process. In order to prepare the roof, they actually had to physically remove our existing skylight to do some repairs to the roof surface before putting it back in. That was a bit of a surprise. All this to say - we officially have our new skylight system installed with the original nested under the dynamic dome! As you can see, you can’t even tell when you're standing inside that something is covering the original. Our master plan actually worked!!
We Did It!
It’s hard to believe we both A) have a new roof (you all know it was quite the journey to get here), and B) we actually pulled off saving our skylight! We even managed to get a second skylight installed throughout the process in our back bedroom. We’re thrilled with how this out-of-the-box, creative solution worked out and are happy to report that there is a world where you can not only save your historic house features but also save lots of $$$. We definitely learned to not take no for an answer when it comes to saving original elements and to ask professionals for help.
We’d love to hear if you all have had any win-wins when it comes to saving historic house features. Let us know in the comments below! Also, be sure to sign up for our newsletter if you want to keep on following our renovation. You’ll be the first to know about new posts and will hear all about our best tips & tricks.


