Designing Our House’s ‘Wow’ Moment
Today we’re walking you through one of the design features we are most excited to see come to life in our house. If you all follow us on Instagram, I’m sure you’ve seen the seemingly never-ending demo we had going on in the living and dining rooms. While much of the demo was for practical matters - i.e. cracking plaster, moisture damage, wiring etc. - there’s one aspect of the demo that was about clearing the way for a big design moment..
It Always Starts With A Challenge
As with any design solution, you are often trying to solve a problem. Many would have probably looked at the “before” of our living room and thought, what’s the problem? While we loved the look of the bookcase and how it accentuated the height of the room, it was virtually impossible to fit a couch comfortably in the room without blocking the view to the dining room. It also meant the sofa had to be off-centered from the tv and fireplace and that just wasn’t what we thought this room wanted.
“Just on the other side of the bookshelf wall is a tiny, little hallway that is truly a missed opportunity. ”
It’s really just a completely unused circulation space and didn’t serve much purpose. By demolishing the existing shelf and opening up the wall, we captured back some much-needed square footage and finally gave our nicely detailed original staircase and railing their moment in the sun (both literally and figuratively).


Designing Our ‘Wow’ Moment
It took a minute to come to terms with eliminating the bookshelf but we felt it was the right thing to do. Our house was built in 1910 (supposedly) but this shelf wasn’t original. That gave us the nudge to move forward with reenvisioning how the space could lay out and how the detailing of our living room could be transformed.
We knew we still wanted to incorporate a custom built-in shelf but needed to figure out exactly what that looked like. The first thing we did was size the opening. It needed to be wide enough so you could walk on either side of the sofa but still needed to function as a bookshelf and art display. Once we nailed down the proportions, it was on to the look & feel. Like any project, we often start with gathering up some of our favorite inspo images. This gave us a road map for what features we wanted to incorporate but also allowed us to make sure we designed something completely unique and our own.


At first, our design for the opening and shelf was fairly rectangular and conventional. Unsatisfied, we decided to work harder at taking cues from existing architectural elements in the house. The result? We’re incorporating arched corners, fluted details, and sunburst medallions made from a casting of the original compo medallion on our stair newel post.
“These little touches not only personalize the design to something that is one-of-kind but also creates the feeling that this shelf has always been here. ”
That is one of the main Howlett & Co design goals for any project - we never want something to feel out of place or foreign in our renovations. We want our fresh, modern design moments to feel right at home in a historic house.


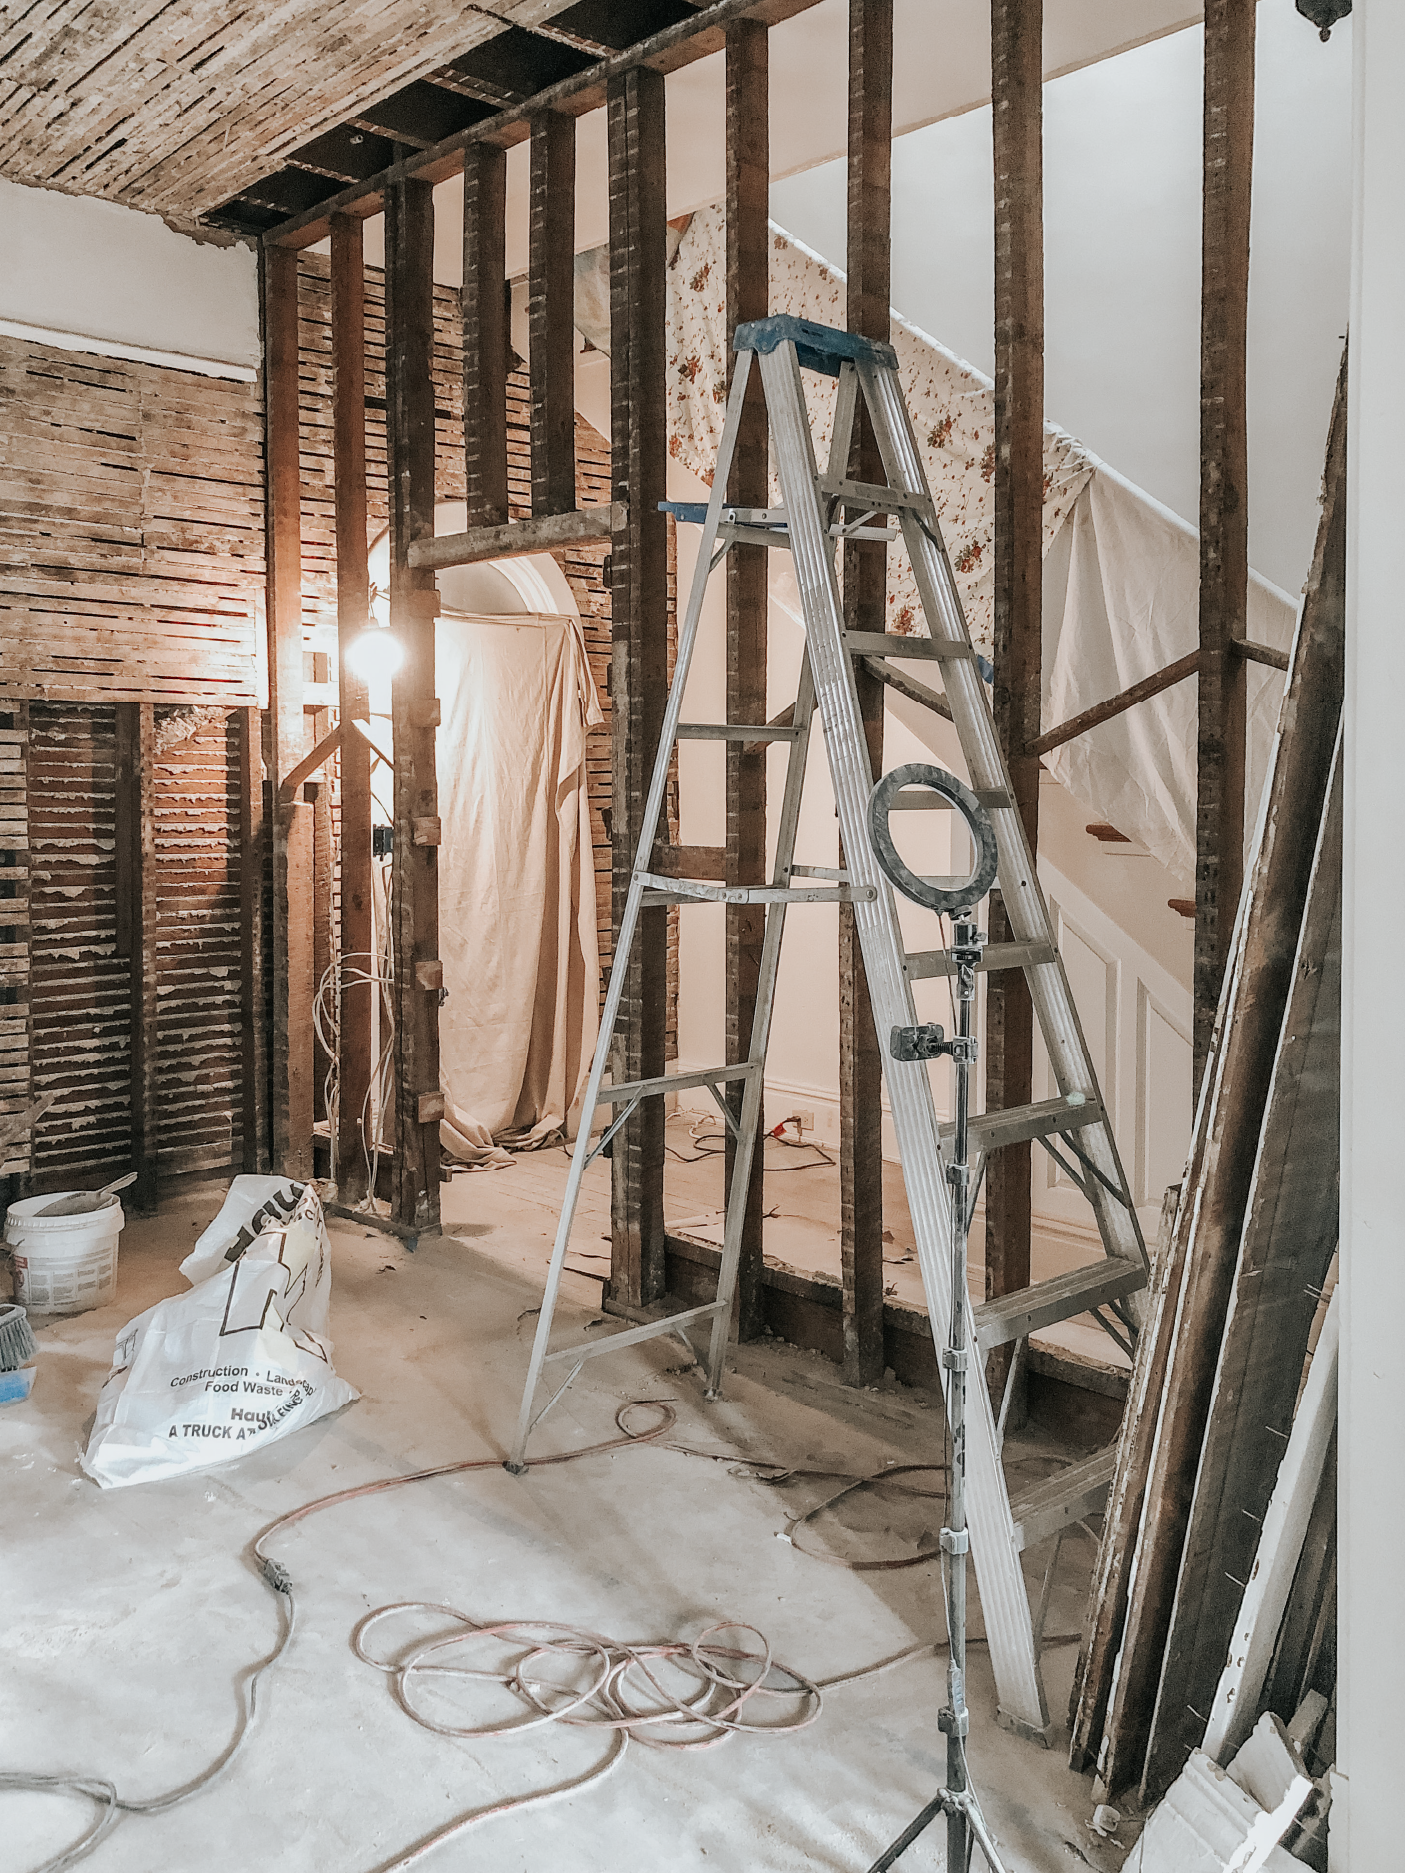
Crash, Crash, Kaboom
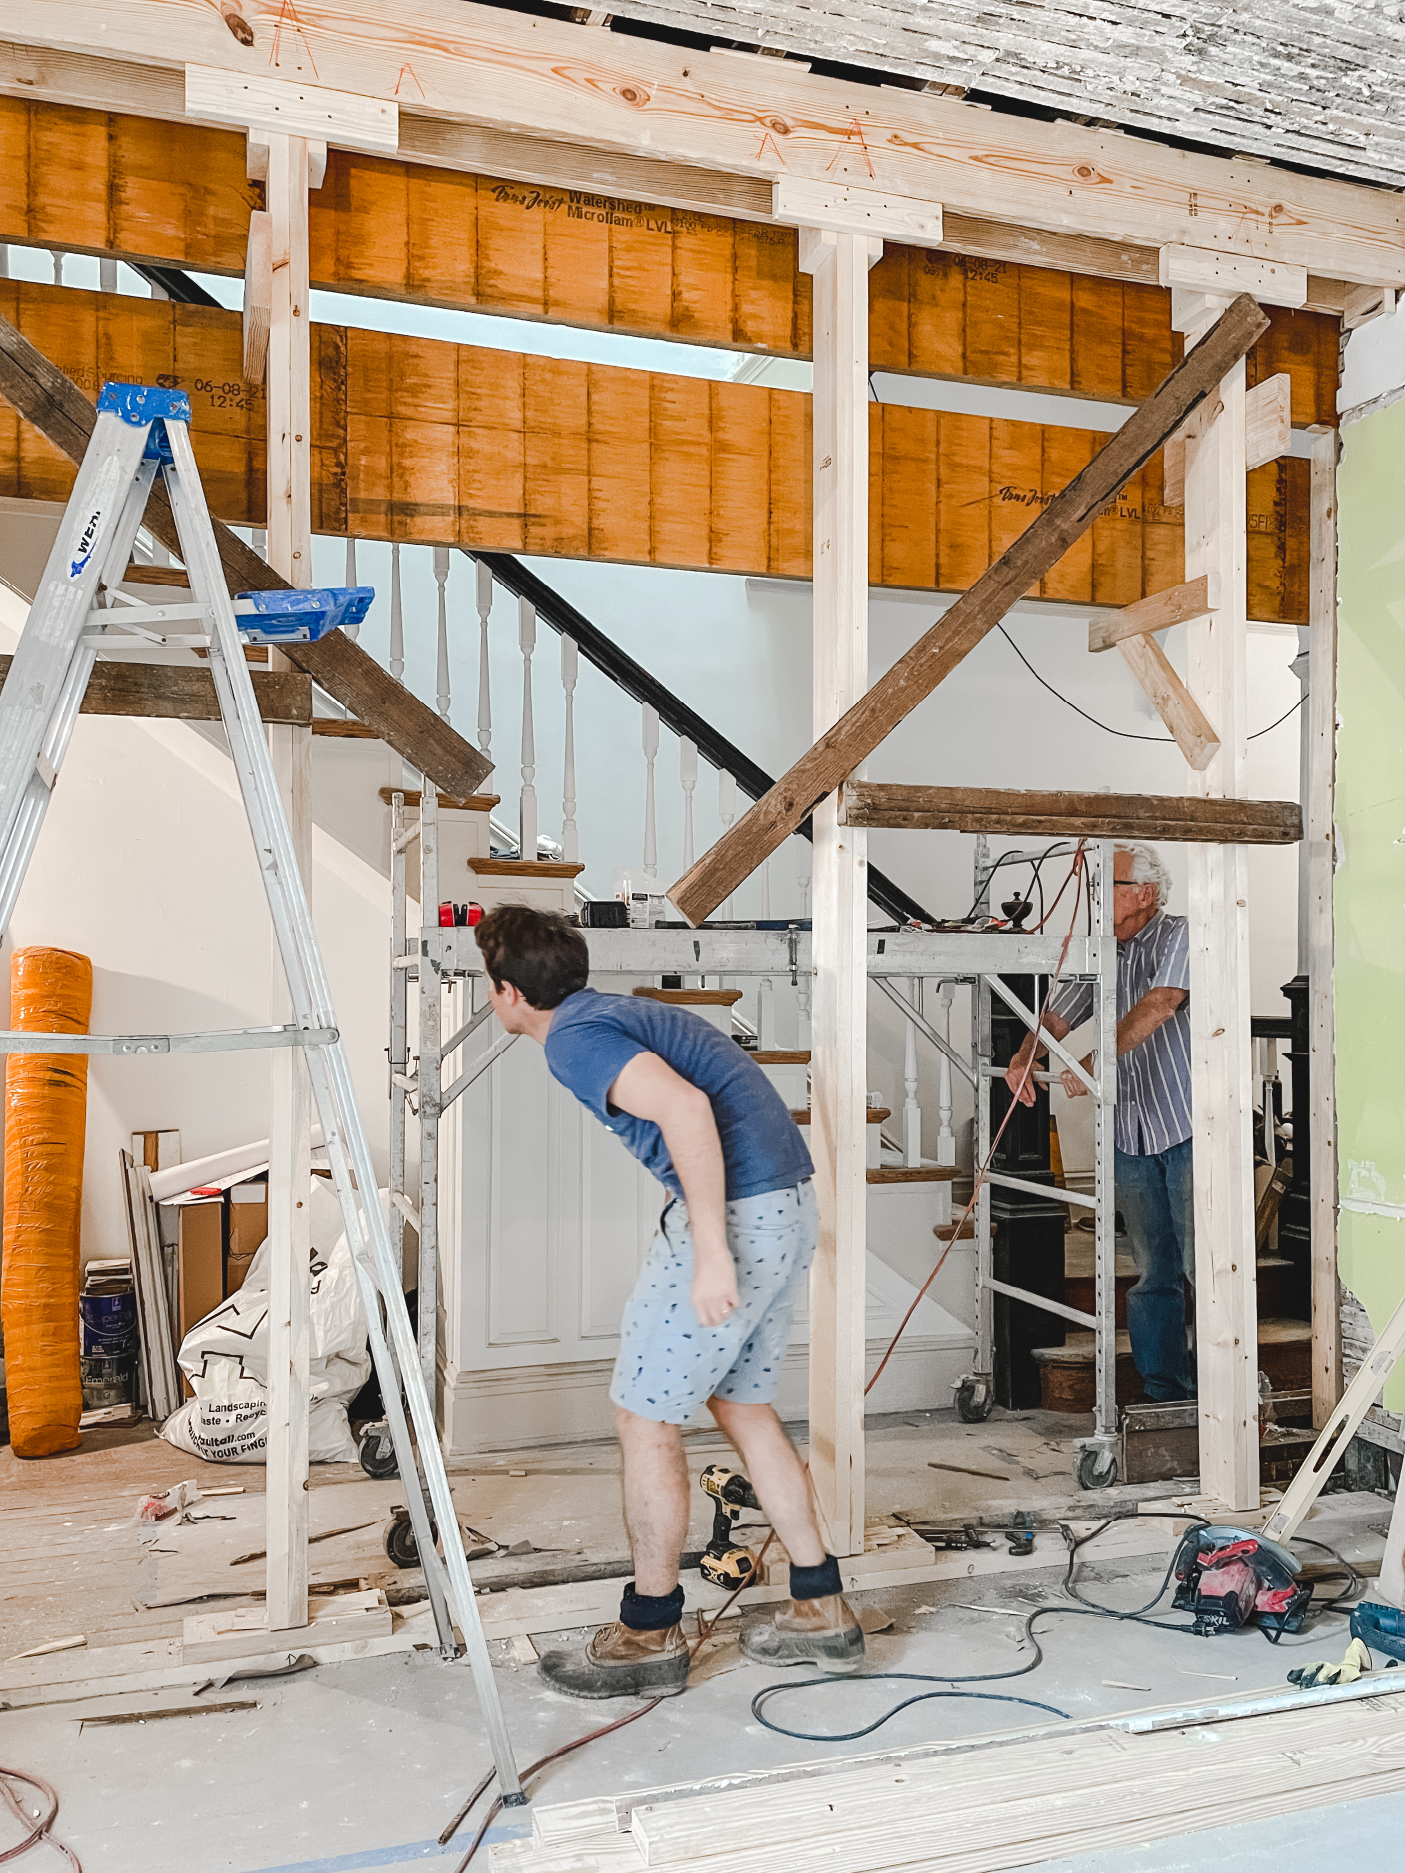
We took our time finalizing the details in our 3D model but got right on the demo in July of last year full of hope to bring the project to life asap. We took all the plaster down, took the laths out, and reinforced the footers in the crawlspace that will ultimately support the new opening.
After shoring up the ceiling to temporarily transfer the load away from the existing wall, we took out the existing wall and replaced it with a 14’6”-wide opening framed out with doubled-up 14” LVL beams. The DIY install, with help from Owen’s dad, was Rachel’s Birthday present!. The next step was drywalling the room, and patching in the location where the old wall was with 3 ¼”-wide edge-grain yellow pine flooring to match the original floors. It was slow and intermittent progress, but by October we had it mostly done.
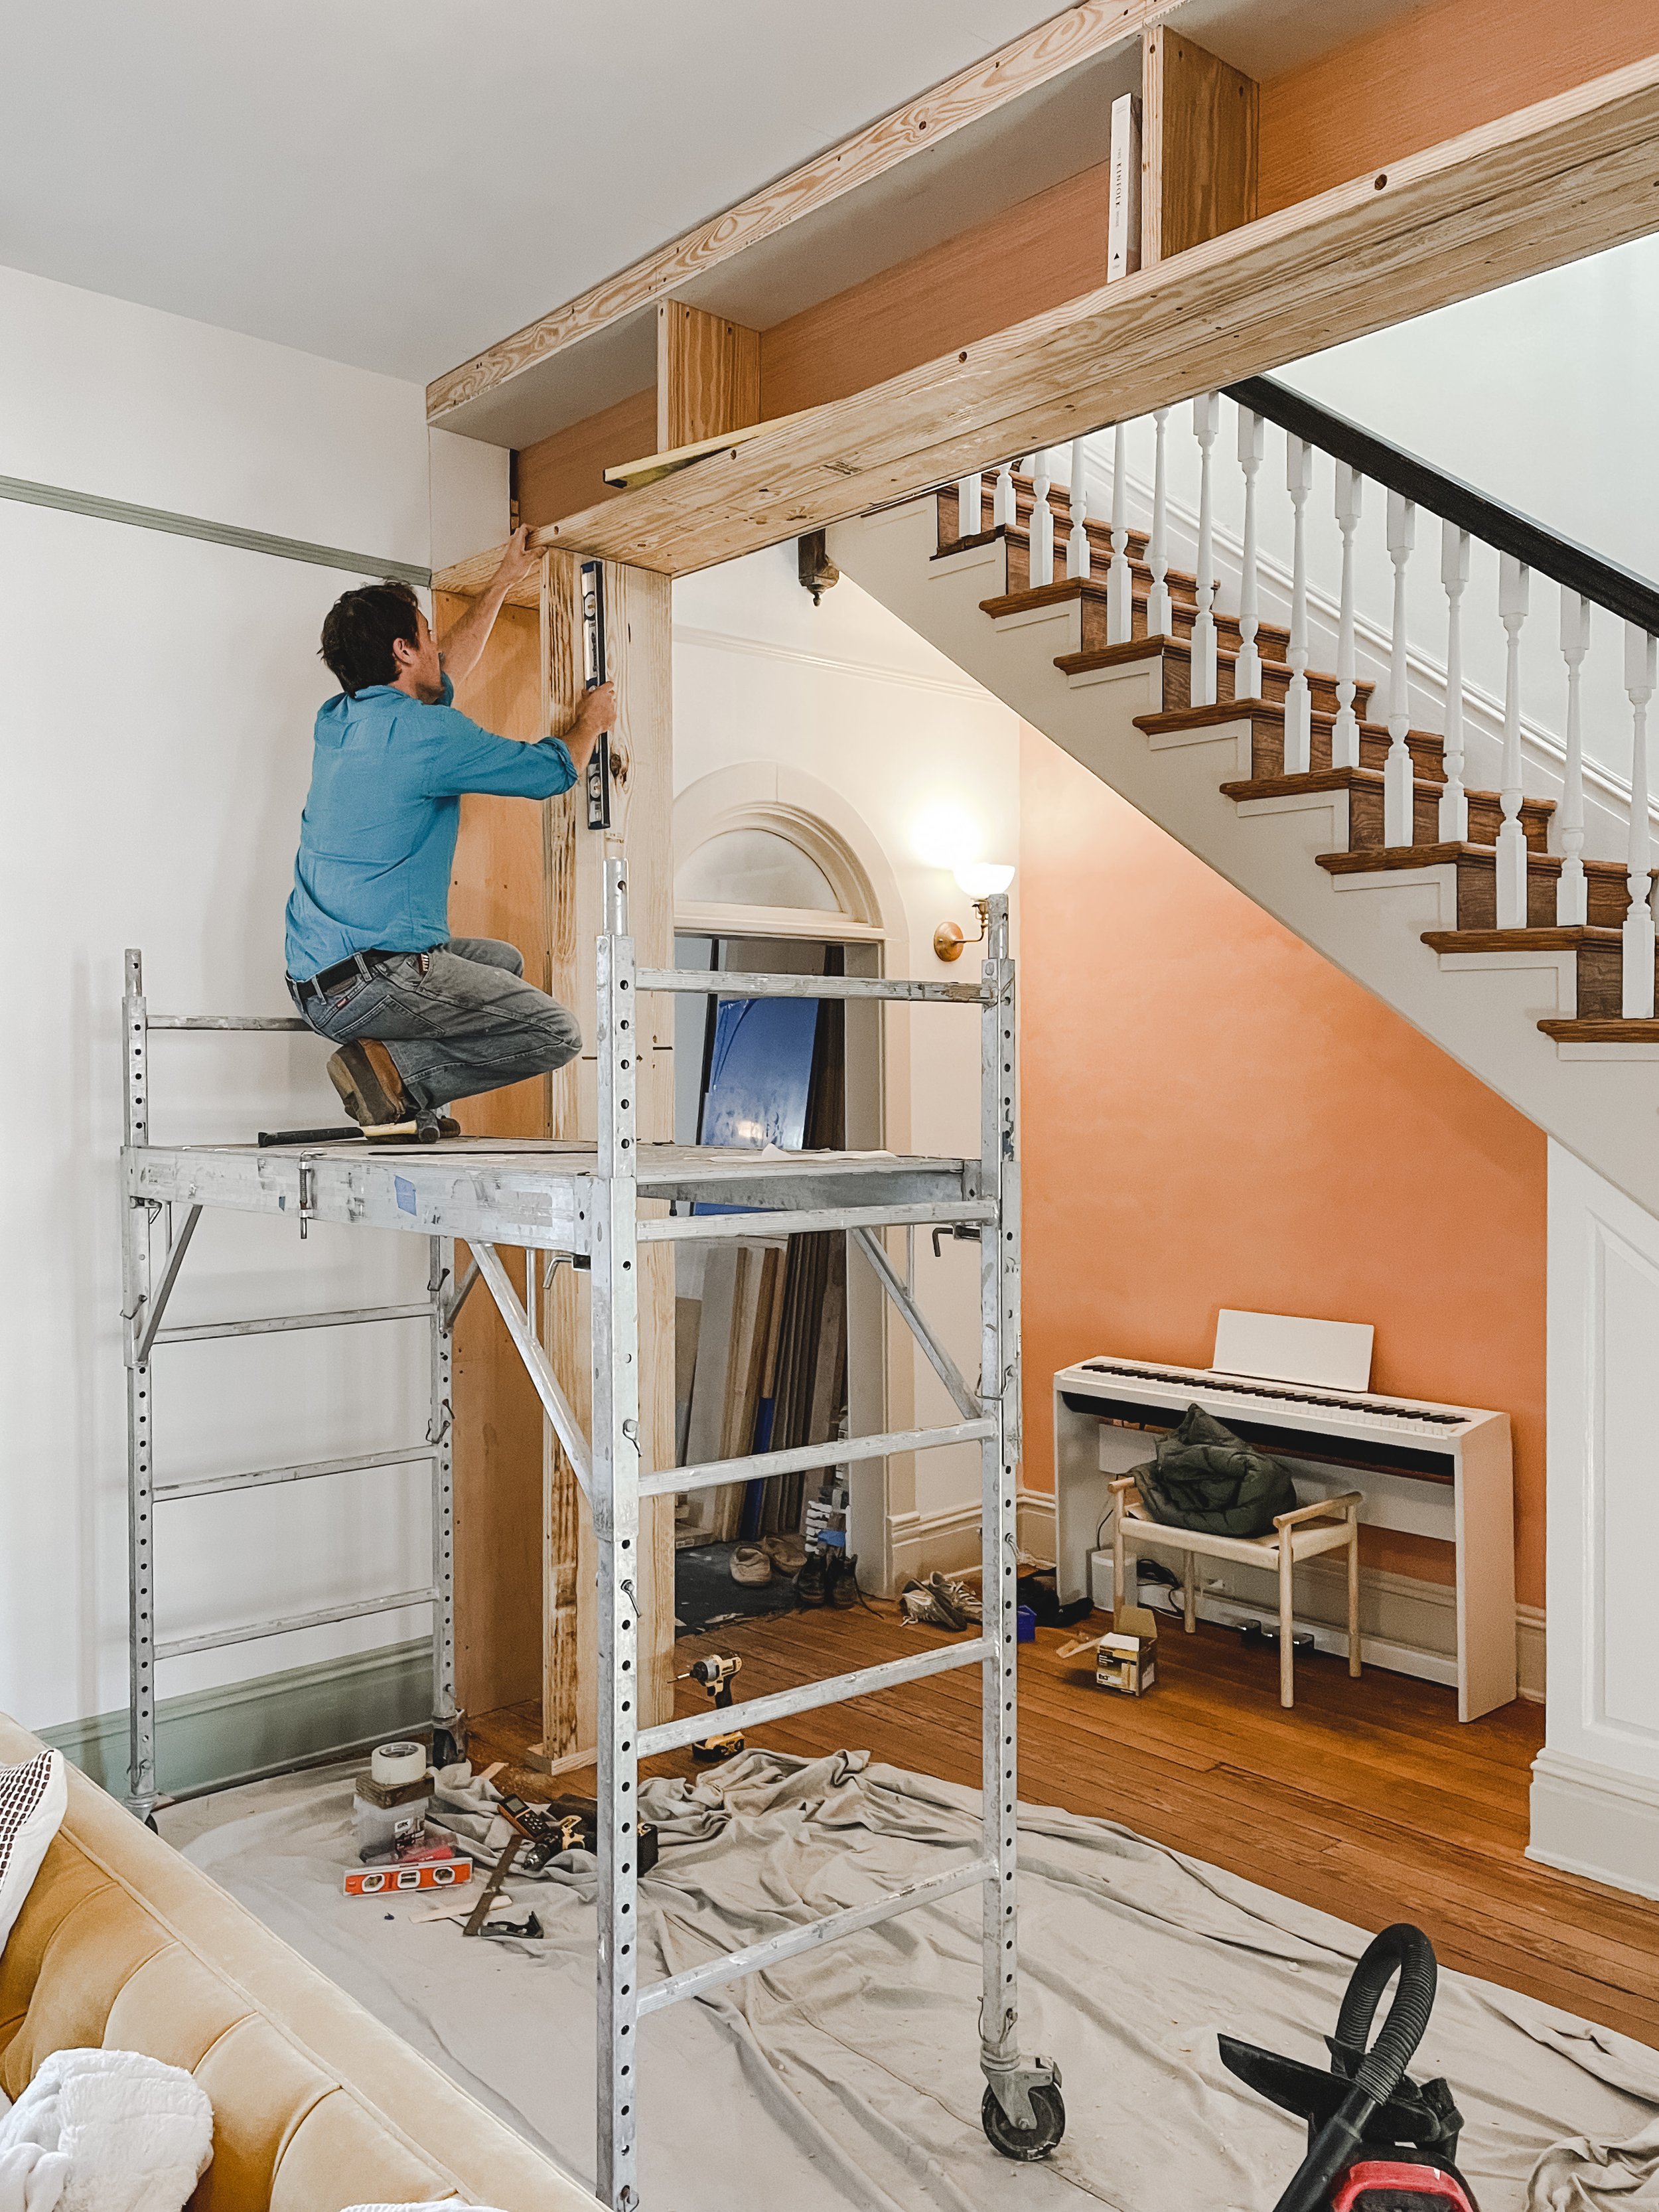
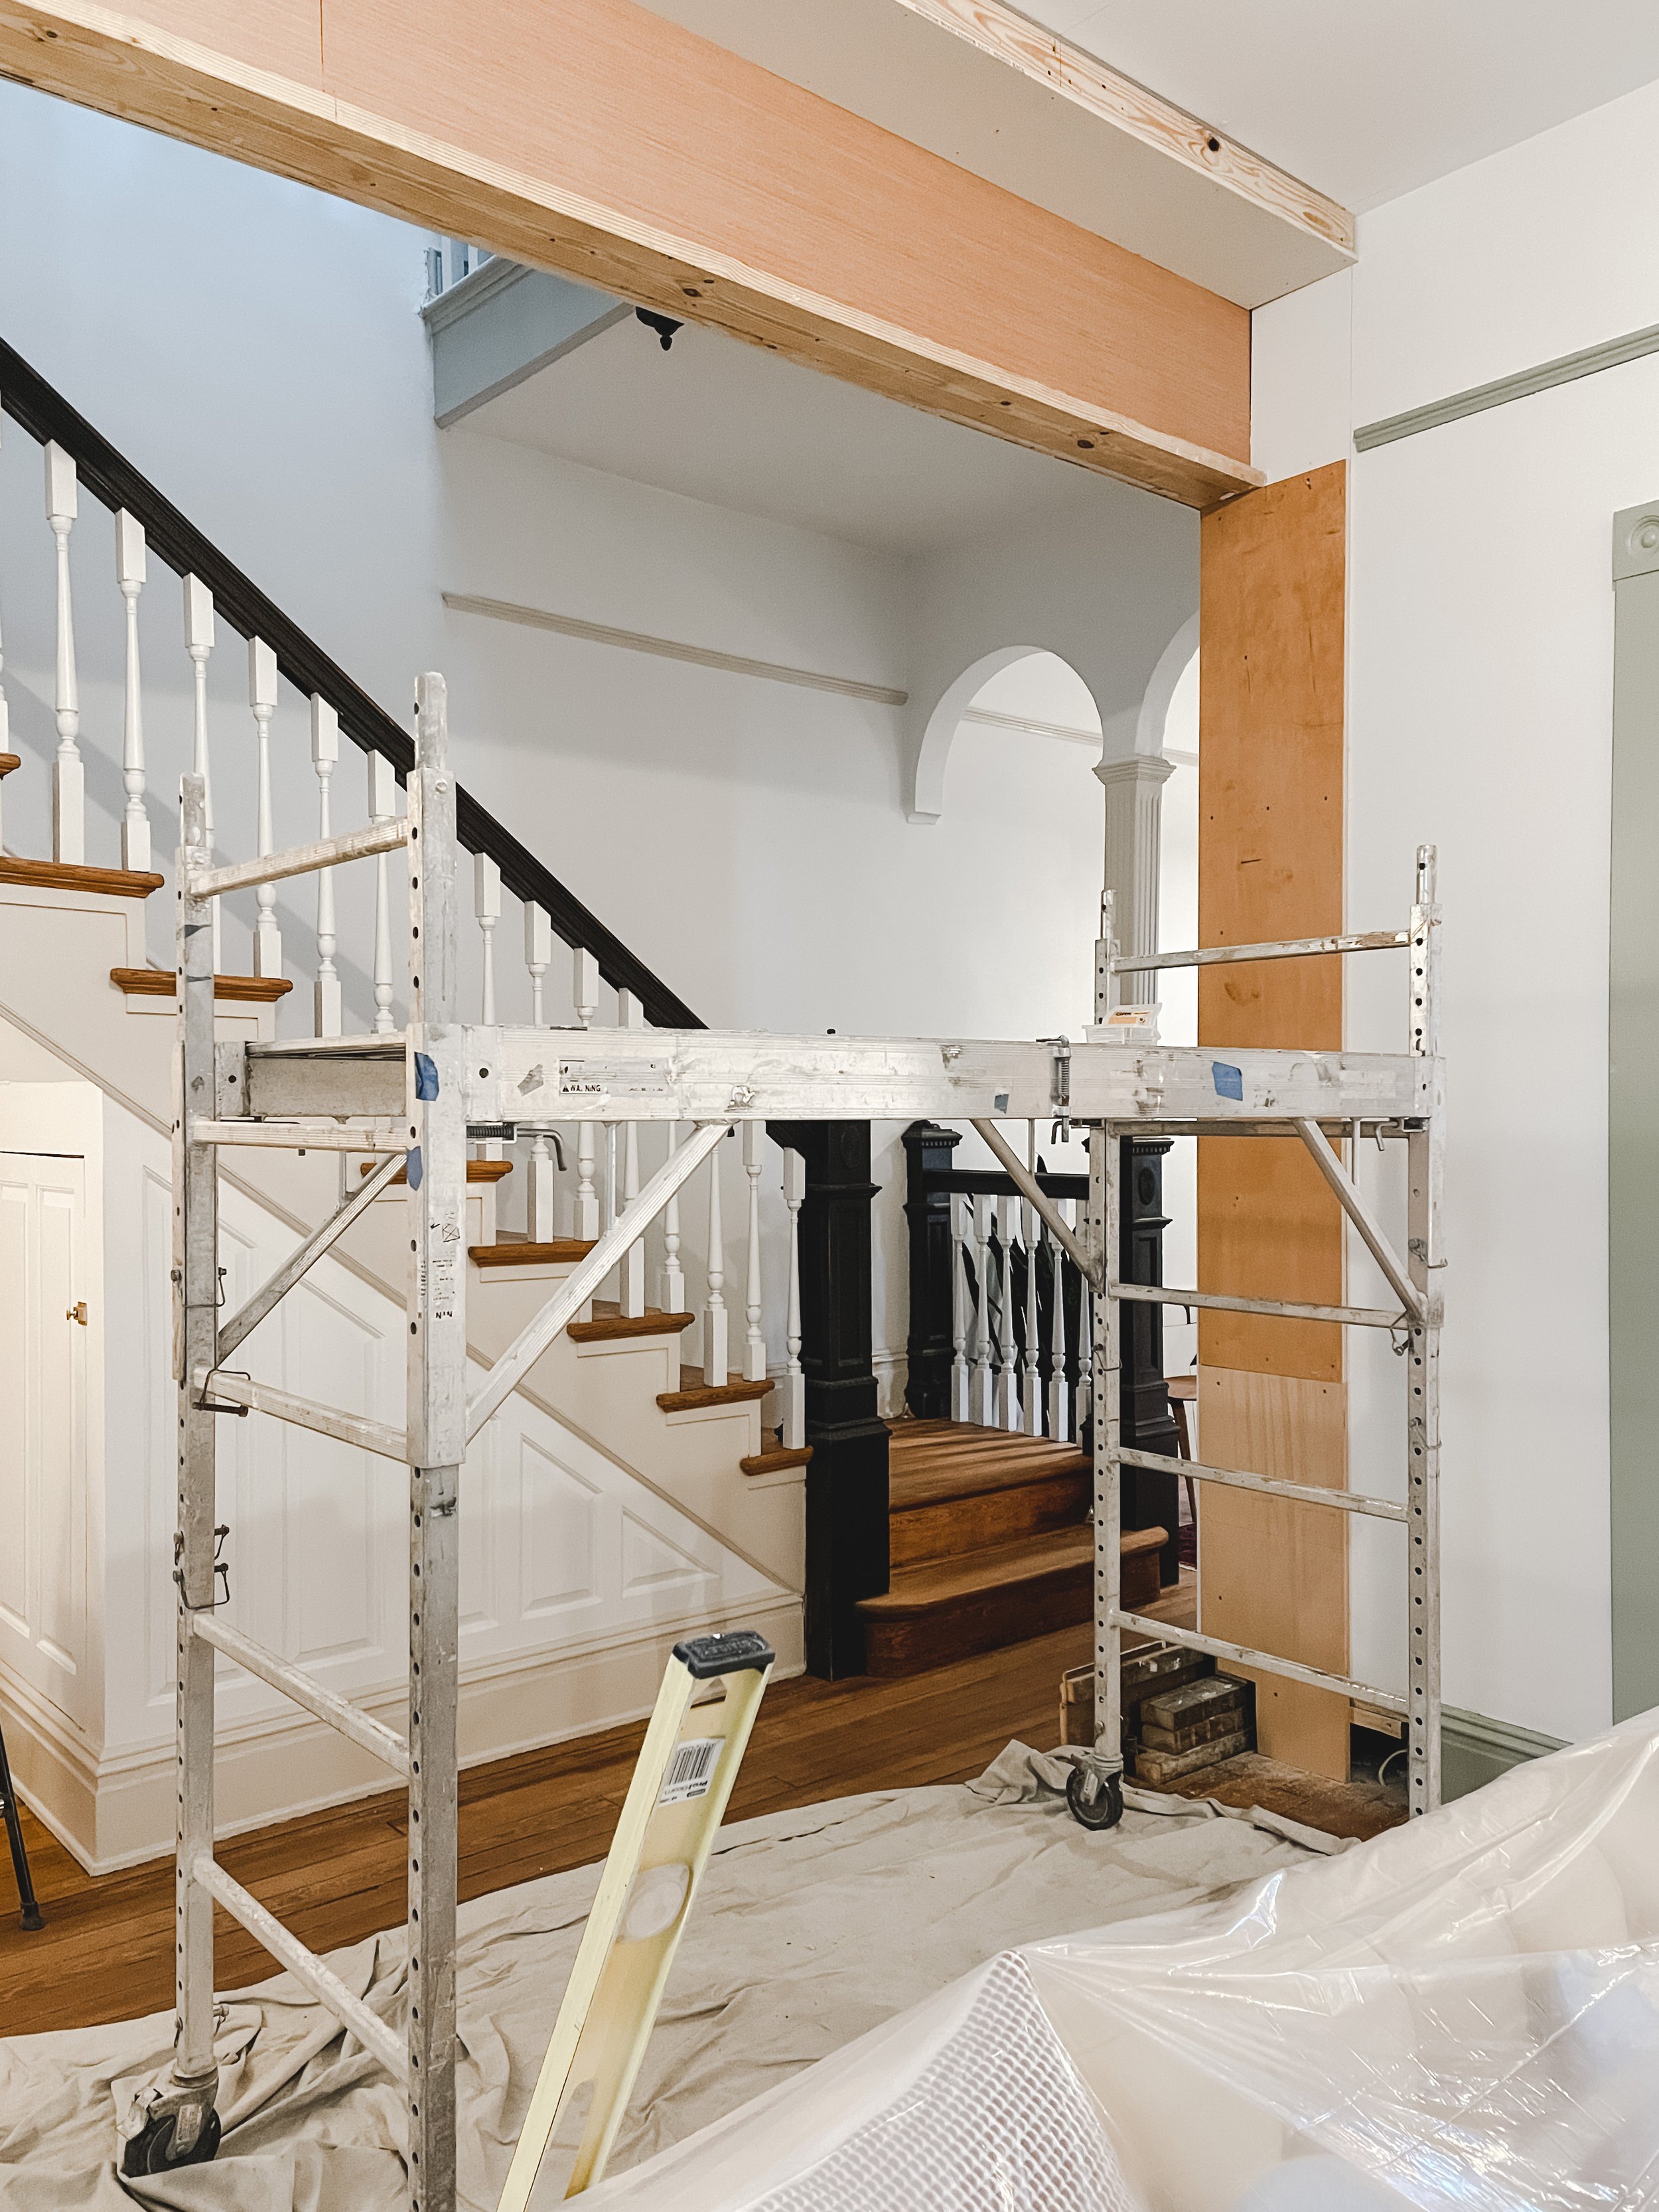
Framing out and Trimming up
With the living room mostly complete, we’ve re-directed our attention back to the framing and detailing the shelf. We printed out templates for the arches and carefully cut out the back-up formwork out of ¾” ply. Attaching the forms to the framing required patience and attention to make sure the tangents at the start and stop of the arch were perfectly aligned.
Getting the crown molding set nice and straight with a ceiling full of bumps and dips was equally challenging - in an old house, it’s all about creating the illusion that things are level, flush, and aligned. We’re still hard at work on the final detailing of the shelf and can't wait to share the final result.
We’re simultaneously renovating the kitchen so we have a lot going on. Speaking of the kitchen, we’ve started a new multi-part blog series soon where we walk you through our kitchen design process, how much we’ve budgeted, and how we plan to pull it off. You won’t want to miss it. Be sure to sign up for our newsletter to be the first to know when the next post goes live. We’ll also keep you in the loop on any living room shelf progress!